Showing posts with label red bean an. Show all posts

Tuesday, October 6, 2009

miniature kabocha confections (nerikiri series)


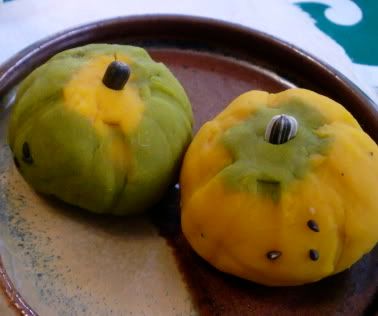
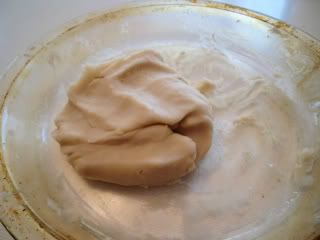
The nerikiri dough (rice flour and white bean an combo) is as easy to use as playdough. A lot of people have been telling me it reminds them of marzipan, which I've never tried. And I don't know if marzipan can be made with a main ingredient other than almonds, but I do know that neriki can be made with alternate ingredients. In today's recipe, I substituted pureed kabocha (Japanese pumpkin) for the white bean an, wrapped the resulting nerikiri around a core of red bean an, and molded it to look like a miniature kabocha.

Ingredients for ten confections:

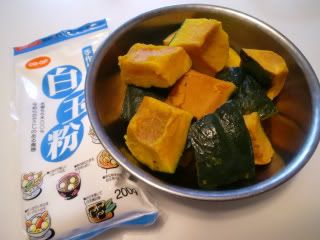
kabocha (or pumpkin)..... enough to result in 300 grams/ 10 oz of puree
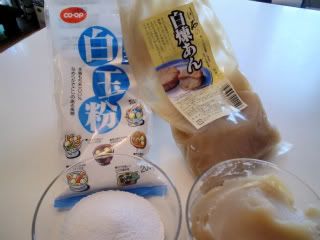
shiratama-ko (glutinous rice flour)....2 teaspoons
sugar (optional)......30 grams/ 1 oz
matcha (powdered green tea).... 1 Tablespoon
tsubuan (coarse red bean an).....150 grams/ 5 oz
black or white sesame seeds for decoration (optional)....20~ 30
pine nuts or sunflower seeds for decoration (optional)....10

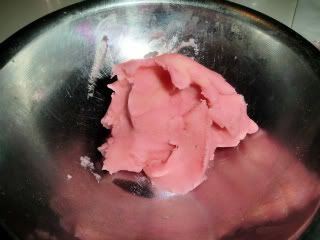
I cut one medium-sized kabocha into chunks and microwaved the chunks (loosely covered with plastic wrap) till the orange flesh was tender. When the chunks had cooled enough to handle, I cut away the hard green peel from the orange flesh, and mashed the flesh with a fork till it was a smooth paste. You can do this in a food processor if you prefer. I didn't add any sugar because I thought the kabocha was sweet enough. But if you like it sweeter, add sugar as you mash the kabocha.

pumpkinnerikiri2

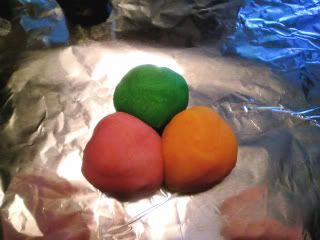
Dissolve the shiratama-ko (rice flour) in a tablespoon of water, and mix it thoroughly into the kabocha puree. Click here for detailed directions (with photos) for making nerikiri. When the kabocha neriki is the right consistency and cooled to room temp, divide the dough in half. Take one of the halves and knead matcha (green tea) powder into it. This will color the dough green and add a wonderful green tea fragrance.

pumpkinnerikiri3

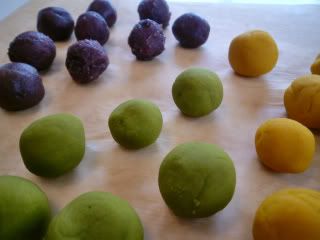
Roll the tsubuan (red bean an) into ten balls. Roll the orange half of the nerikiri dough into about 15 balls, and the green half into about 15 balls.

pumpkinnerikiri4

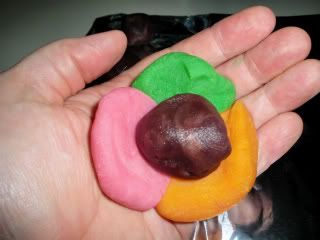
Once again, click here to see photos of how to put three nerikiri balls together in your palm and press them together to form a flat circle large enough to enclose one of the tsubuan balls. Only this time, combine the orange and green so that any one confection will be mostly green (with a dash of orange), or mostly orange (with a dash of green). Pinch pieces off the balls to adjust the amount of color you are aiming for.

pumpkinnerikiri5

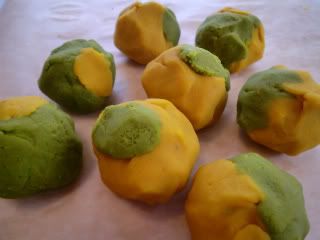
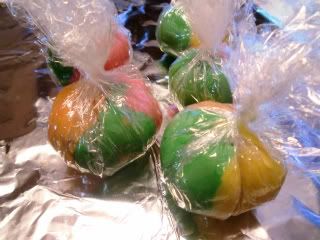
Make sure the seams are smooth and the separate pieces of dough are sticking well to each other. Then press gently down on the top so that each ball is slightly squashed. Use the dull edge of a straight utensil (I used chopsticks) to press dents into the flattened balls to make them look more like real kabocha. I used sesame seeds to express the imperfections in the outer skin of the kabocha, and a sunflower seed to represent the stem.

pumpkinnerikiri1

Saturday, October 3, 2009

O-hagi (plus an explanation of "an")


A Dictionary of Japanese Food by Richard Hosking describes O-hagi as an "inside-out rice cake, so called because the an normally inside the cake is on the outside. The cake is named after hagi (bush clover), which flowers in the autumn and which the cake vaguely resembles. When these cakes are made in spring, they are called Botan mochi (peony cakes). They are made with a mixture of glutinous and non-glutinous rice and are coated with tsubuan... Simple, very popular, and very good."

I often think of Ohagi as an inside-out daifuku, which I guess is what Hosking means by "rice cake.". I introduced daifuku in my blog on Ichigo-Daifuku (Strawberry Daifuku), in which a fresh strawberry and red bean an were wrapped in mochi. An is a paste that can be made from various starchy ingredients and sugar, but the most common ingredient is azuki beans, which are reddish. Red bean an comes in various degrees of coarseness. The tsubu-an mentioned in the quote above is a coarse an which includes pieces of the bean skin. Koshi-an is smooth an where the skins have been sieved out. Shiro-an is made from white kidney beans. An can also be made from sweet potatoes, chestnuts, and lily roots, among other things.

Today I made kabocha (Japanese pumpkin) an to slather over my ohagi. I use a short-cut method to make the mochi center, by following the directions in the aforementioned Strawberry Daifuku blog. You may, of course, prepare a mixture of glutinous mochi rice and non-glutinous rice from scratch, but you won't find directions here for that (sorry).

To make the pumpkin an, I cut up a Japanese pumpkin (kabocha) and cooked it in my microwave until it was soft. I scraped the orange flesh off the tough green outer peel, and mashed it with a fork. Use a food processor if you like. Kabocha are naturally sweet, but if you want it sweeter-- or if you use a pumpkin that isn't quite as sweet-- add sugar to taste as you mash it.

Make oblong rolls of mochi (made sufficiently soft by following the directions in the daifuku blog) and coat with with the pumpkin an. I made a few of the traditional ohagi covered in coarse red bean an, a few with the pumpkin an, and placed one of each on a dish for contrast.

Photobucket

Wednesday, September 23, 2009

fall leaves (nerikiri series)


I started my wagashi adventures with the easier confections that women of my parents' generation, and to a lesser degree my own, made for their families at home. Nowadays these confections are readily available at any market or roadside stall, so today's busy young mothers are less inclined to make them from scratch. I meant to prove to myself, and to my readers, that these confections can be made easily, cheaply, and quickly, and that they are so much better for you and your kids than the pre-packaged, mass-produced junk we would eat otherwise.

Before long I was ready to try something a bit more challenging, and I decided to take a swing at Nerikiri, which is the basis for a whole wonderful world of delicately-shaped and subtly-colored confections. The basic ingredients are the familiar ones from earlier posts.

Nerikiri ingredients:
White bean an........ 300 grams (10 oz)
Shiratamako........5 grams (about 2 teaspoons)
Water.......1 tablespoon

FallLeavesNerikiri2

Place the shiratamako in a small bowl with the water, and stir till the rice flour is completely dissolved. Add the white bean an to the dissolved shiratamako and mix thoroughly. Divide the an mixture into 6~8 equal portions and lay, without overlapping, in a ring around the outer edge of a round microwave-safe dish (I used a pyrex pie dish).

Leave the dish uncovered, and nuke in microwave for 3 minutes so that the excess moisture will evaporate out of the an mixture. Depending on the power of your microwave, you may have to repeat this two or three times. I ended up microwaving at 500W for a total of 7 minutes before the mixture was dehydrated enough (you want to be able to knead it like playdough).

Take the an mixture out of the microwave and scrape the separate portions into one lump and knead together so that it becomes a smooth ball of dough. Cover this with a damp kitchen towel and let sit until cooled to room temperature.

FallLeavesNerikiri1

FallLeavesNerikiri3

FallLeavesNerikiri4

Directions for Fall Leaves confection:
An dough from recipe above
Red Bean an..... enough to make 6~8 1-inch sized balls
Food dye

Divide the cooled nerikiri dough into three lumps roughly equal in size. Using food dye, color one lump green, another one yellow or orange, and the last one red or pink. I used powdered dye and dissolved the tiniest amount (1/8 teaspoon) with a drop or two of water before kneading the an dough into it. To make the orange color, I mixed yellow and red dye together before kneading the dough into it.

If the an dough gets too moist during this process, put it back into the microwave for a couple of minutes to dry it out enough to handle like playdough. Make 6~8 small balls from each color of dough. Place one ball of each color together (as shown below) and gently squeeze them so that they stick together. Place this on the palm of your hand and stretch it out without letting the colors mix up too much. Put a ball of red bean an in the middle and gently pull the colored dough around it till it is wrapped completely. Place this large dough ball in the center of a square of plastic wrap and twist the corners firmly at the top. (Traditionally, this is done with a thin cotton cloth.)

FallLeavesNerikiri5

FallLeavesNerikiri6

FallLeavesNerikiri7

FallLeavesNerikiri9

Let the confection settle for a while in a cool place (refrigerator would be good). When ready to serve, gently remove the plastic wrap so that the wrinkles formed in the confection are not disturbed. The idea is to evoke autumn by reproducing the tints of fall leaves. Experiment with different color intensities and combinations to suit your taste. I made some with just green and yellow dough, and others with just orange and red.

If you prefer a subtler color combination than shown here, experiment with dye products and techniques and you see what you can come up with. I will be posting several more in the nerikiri series of Japanese confections. The one shown here is one of the very simplest of these, but they can become quite fancy. Once you get the hang of nerikiri, there's so much you can do with it!